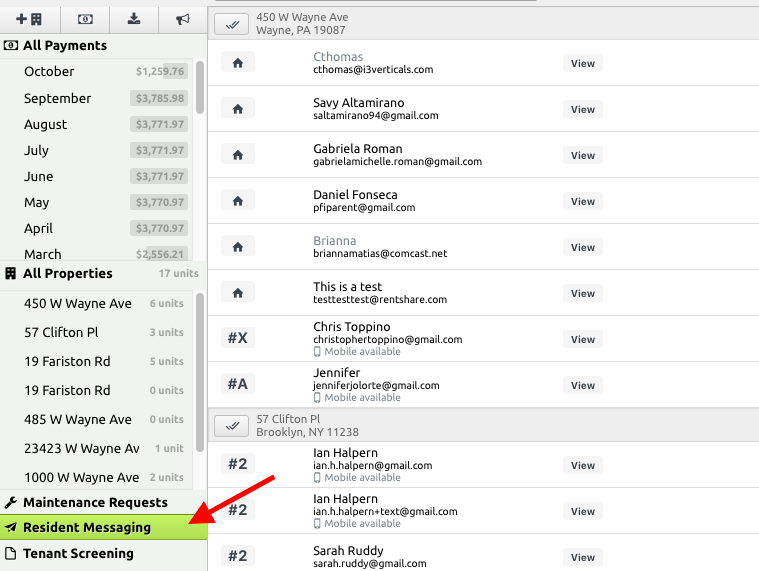
When the Resident Messaging app is available on a landlord's account it will appear as an option on the lower left-hand corner of the screen. It can also be accessed on mobile from the general menu.

Create A New Message:
1) Select your recipients. Click the check mark button to the left of each property to send a single message to everyone at a particular property, OR click on a specific tenant or tenants.
2) Click "New" on in the upper center of the dashboard
3) Select your message type - Mobile Alert/Test Message, Custom Email, or Paperless statement (if available for your account)*
4) Draft your message (character limits apply for mobile messages)
5) Choose when to send. By default messages are set to send instantly, but if you click the "Future" button you can set a specific date and time to send your message.
6) Click the green "Send" button
Bombs Away!
How To Create a Template or Macro:
1) Navigate to the new message window and draft the message you wish to save for later.
2) Click the "Templates" drop-down in the lower right-hand corner
3) Enter a name for your new template and click "Save".
That's it! Your new template can now be accessed from that same "Templates" drop-down menu moving forward.
How to View Message History?
A running list of messages sent can be viewed by simply clicking on the "Messages" button at the top center of the Resident Messaging dashboard.
*Mobile Messaging: Push Notifications vs Text Messaging vs Email:
Selecting Mobile Messaging means that residents will receive the message on their phone if at all possible. If a resident has a Place powered mobile app, the resident will receive a push notification. If they do not have a mobile app but there is a phone number on file for that resident they will receive a text message. If a resident has neither the mobile app or a phone number on file the resident will receive the 'Mobile Message' as an email alert.

Comments
0 comments
Article is closed for comments.